
今度研究会で使えそうなクソコラも作れる
この記事は Scala Advent Calendar 2020 - Qiita 18日目の記事です。
完全に自分用のメモなのですが、コンパイラ周辺ツールの Scala3 対応に備えて、dotty の interactive compiler API の使い方を一部学んでみたのでその学習メモを残しておく。
今回試したコードは以下のリポジトリにまとまっていますが、このブログでは試行錯誤した過程を書いていこうと思います。今回は使い方だけ見たけど次はどう実装されてるかまで読んでいきたい。
もうちょっと雑なやつ dotty tools で遊んでみる - tanishiking-pub
また使い方を勉強するにあたっては dotty language server を参考にしました。 dotty/DottyLanguageServer.scala at eddd4da41ac14057edf4db6f9a24de6f768dbbb3 · lampepfl/dotty
(dotty language server はあくまで参考実装という感じで、将来的には変わらず intellij-scala と metals が scala3 対応を頑張っていく感じになるんではなかろうか? dotty-language-server は最低限の機能は備えているが、実プロジェクトで利用するにはいろいろと機能が不足している割に暫く手が入ってないので (要出典))
dotty tools の主なエンドポイントは InteractiveDriver というクラス
Driver
sbt console で遊んでみよう。まずは砂場とするプロジェクトを作る
// project/plugins.sbt
 addSbtPlugin("ch.epfl.lamp" % "sbt-dotty" % "0.4.6")
// build.sbt
val dottyVersion = "3.0.0-M2"

lazy val root = project
  .in(file("."))
  .settings(
    name := "dotty-interactive-playground",
    version := "0.1.0",

    scalaVersion := dottyVersion,

    libraryDependencies ++= List(
      "org.scala-lang" %% "scala3-compiler" % scalaVersion.value,
      "io.get-coursier" % "interface" % "1.0.1",
      "com.lihaoyi" %% "pprint" % "0.6.0",
    )
  )
このproject内で sbt console を実行してみる。
 scala> import dotty.tools.dotc.interactive.InteractiveDriver

// まずは InteractiveDriver クラスを instantiate
// InteractiveDriver にはコンパイラに与える classpath やコンパイラオプションを与える。
// とりあえず何も与えずにインスタンス化しようとしてみる
 scala> val driver = new InteractiveDriver(List.empty)
 dotty.tools.dotc.MissingCoreLibraryException: Could not find package scalaShadowing from compiler core libraries.
 Make sure the compiler core libraries are on the classpath.
なるほど、scala3-library の classpath を与えないと死ぬようになってるのか
The official standard library for Scala 3.0 is the Scala 2.13 library. Not only the source code is unchanged but it is even not compiled and published under 3.0. It could be, but it would be useless because, as we have seen, a Scala 3.0 module can depend on a Scala 2.13 artifact. https://scalacenter.github.io/scala-3-migration-guide/docs/compatibility.html#the-scala-standard-library
とあるように、scala3の標準ライブラリは2.13のライブラリを利用しているため、scala3-library の classpath に加えて、scala2.13 の標準ライブラリのクラスパスも与えて
scala-library の classpath ってどこにあるんだっけ?
- sbt の依存に dotty-libraryが含まれている場合 sbt show runtime:fullClasspath で依存しているライブラリのclasspathが分かるのでコピペできる
scala> val classpaths = Seq(
  "/Users/tanishiking/Library/Caches/Coursier/v1/https/repo1.maven.org/maven2/org/scala-lang/scala3-library_3.0.0-M2/3.0.0-M2/scala3-library_3.0.0-M2-3.0.0-M2.jar",
  "/Users/tanishiking/Library/Caches/Coursier/v1/https/repo1.maven.org/maven2/org/scala-lang/scala-library/2.13.4/scala-library-2.13.4.jar"
)

scala> val driver = new InteractiveDriver(List("-classpath", classpaths.mkString(java.io.File.pathSeparator)))
val driver: dotty.tools.dotc.interactive.InteractiveDriver = dotty.tools.dotc.interactive.InteractiveDriver@4123624c
もしくは別にこんなことしなくても coursier の fetch API で必要なライブラリを取得してきて、そのクラスパスをInteractiveDriverに食わせてやる
import coursierapi.{Fetch, Dependency}
import java.nio.file.Path

val fetch = Fetch.create()

import scala.jdk.CollectionConverters._

fetch.addDependencies(
  Dependency.of("org.scala-lang", "scala3-library_3.0.0-M2", "3.0.0-M2")
)

val extraLibraries: Seq[Path] = fetch
      .fetch()
      .asScala
      .map(_.toPath())
      .toSeq

val driver = new InteractiveDriver(
   List(
     "-color:never",
     "-classpath",
     extraLibraries.mkString(java.io.File.pathSeparator)
   )
)
InteractiveDriver を使っていろんなコードを interactive に解析してみよう
InteractiveDriver#run は dotty/InteractiveCompiler.scala at 8059fcec9135e5672cc8a0359329258c6aaf837b · lampepfl/dotty を Mode.Interactive でコンパイルを実行し、diagnostics を返し、また結果を compilation unit として driver に追加する。val uri = new URI("file:///virtual") driver.run(uri, "object X { }") pprint.log(driver.openedFiles) // LinkedHashMap(file:///virtual -> /virtual) pprint.log(driver.openedTrees(uri)) // List( // SourceTree( // tree = TypeDef( // name = X$, // rhs = Template( // constr = DefDef( // name = <init>, // tparams = List(), // vparamss = List(List()), // tpt = TypeTree[TypeRef(ThisType(TypeRef(NoPrefix,module class scala)),class Unit)], // preRhs = Thicket(trees = List()) // ), // parentsOrDerived = List( // Apply( // fun = Select( // qualifier = New( // tpt = TypeTree[TypeRef(ThisType(TypeRef(NoPrefix,module class lang)),class Object)] // ), // name = <init> // ), // args = List() // ) // ), // self = ValDef( // name = _, // tpt = SingletonTypeTree(ref = Ident(name = X)), // preRhs = Thicket(trees = List()) // ), // preBody = List() // ) // ), // source = /virtual // ) // )
エラーがあるコードを与えてみる
val sourceParital = "object X { def x = 1.toSt } "
val uriPartial = new URI("file:///partial")
val diag = driver.run(uriPartial, sourceParital)
pprint.log(diag)
// List(
//   class dotty.tools.dotc.reporting.Diagnostic$Error at /virtual:[19..21..25]: value toSt is not a member of Int - did you mean (1 : Int).toInt?,
//   class dotty.tools.dotc.reporting.Diagnostic$Info at ?: 1 error found
// )
エラーが帰ってきた。しかし openedTree には error symbol っぽいものを使ってエラー回復したと思われる部分的な構文木が登録されている。これのおかげで部分的なコードでも補完とかnavigationが実行できるわけだね
pprint.log(driver.openedTrees(uriPartial))
// Mode.Interactive makes parser error resillient using <error> symbol?
// ...
// preBody = List(
//       DefDef(
//         name = x,
//         tparams = List(),
//         vparamss = List(),
//         tpt = TypeTree[dotty.tools.dotc.core.Types$PreviousErrorType@752771a8],
//         preRhs = Select(qualifier = Literal(const = ( = 1)), name = toSt)
//       )
//     )
Completions.completion を使って、指定したポジションで completion API を実行してみる。さっきのコードの 1.toS のところで補完を実行してみよう。
import dotty.tools.dotc.interactive.{InteractiveDriver, Interactive, Completion}
import dotty.tools.dotc.util.{Spans, SourcePosition}
import dotty.tools.dotc.core.Contexts._


val pos = new SourcePosition(
  driver.openedFiles(uriPartial),
  Spans.Span(sourceParital.indexOf(".toSt") + ".toS".length) // run completion at "1.toS"
)
val completions = Completion.completions(pos)(using driver.currentCtx.fresh.setCompilationUnit(driver.compilationUnits.get(uriPartial).get))
pprint.log(completions)
// (
//   21,
//   List(
//     Completion(label = "toShort", description = "=> Short", symbols = List(method toShort)),
//     Completion(label = "toString", description = "(): String", symbols = List(method toString))
//   )
// )
toString と toShort が補完された
次は定義ジャンプなんかを実装するために利用する Definition.findDefinition を使って、あるシンボルの定義元を探す機能を利用してみる。
val sourceDefinition = "object Definition { def x = 1; val y = x + 1 }"
val uriDefinition = new URI("file:///def")
driver.run(uriDefinition, sourceDefinition)
given ctx as Context = driver.currentCtx

val pos = new SourcePosition(driver.openedFiles(uriDefinition), Spans.Span(sourceDefinition.indexOf("x + 1")))
val path = Interactive.pathTo(driver.openedTrees(uriDefinition), pos)

// Feeding path to the pos, and return definition's tree
val definitions = Interactive.findDefinitions(path, pos, driver)
pprint.log(definitions)
// List(
//   SourceTree(
//     tree = DefDef(
//       name = x,
//       tparams = List(),
//       vparamss = List(),
//       tpt = TypeTree[dotty.tools.dotc.core.Types$PreviousErrorType@6b6b68d0],
//       preRhs = Select(qualifier = Literal(const = ( = 1)), name = toSt)
//     ),
//     source = /partial
//   ),
//   SourceTree(
//     tree = DefDef(
//       name = x,
//       tparams = List(),
//       vparamss = List(),
//       tpt = TypeTree[TypeRef(ThisType(TypeRef(NoPrefix,module class scala)),class Int)],
//       preRhs = Literal(const = ( = 1))
//     ),
//     source = /def
//   )
// )
本来欲しいのは後者だけだったのだけれど、他所の compilation unit で定義した x も引いてきてしまったが、とりあえず定義元のコードの構文木を取得することができた。
scala> import dotty.tools.dotc.core.Contexts._

scala> given Context = (new ContextBase).initialCtx
lazy val given_Context: dotty.tools.dotc.core.Contexts.Context

scala> import dotty.tools.dotc.parsing.Parsers

scala> import dotty.tools.dotc.util.SourceFile

scala> val parser = new Parsers.Parser(SourceFile.virtual("<meta>", "class X {} extends Base;"))
val parser: dotty.tools.dotc.parsing.Parsers.Parser = dotty.tools.dotc.parsing.Parsers$Parser@175db8b0

scala> parser.parse()
val res1: dotty.tools.dotc.ast.untpd.Tree = PackageDef(Ident(<empty>),List(TypeDef(X,Template(DefDef(<init>,List(),List(),TypeTree,EmptyTree),List(),ValDef(_,EmptyTree,EmptyTree),List(EmptyTree)))))

Scala Advent Calendar 2020 - Qiita 3日目です
ここ2,3年の間にScalaの開発ツールチェーンは進化を続けていて、Scalaの開発体験はめちゃくちゃ良くなってきています。例えば、数年前だと
という感じだったのですが、現状はかなり改善されていて
基本的に OSX / VSCode での環境構築方法を書いていきます。InttelliJ の構築もそのうち書きたい
まだ2020年だけどもうすぐ2021年だし2021年ってタイトルにしちゃった。
とりあえずJava11を入れておけば良いと思います。Javaディストリビューションはいろいろあるけどローカルなら何でも良いんじゃないんですかね? oracle とか adoptopenjdk とかで
$ brew cask install java11
# ~/.zshrc なんかに
export JAVA_HOME=`/usr/libexec/java_home -v 11`
$ java -version
してなんか出てればOK
HomebrewでインストールできるJDKまとめ(2019年11月時点) - Qiita
scala の主流なビルドツールである sbt - The interactive build tool をダウンロードします
$ brew install sbt
$ sbt new scala/hello-world.g8
[info] welcome to sbt 1.4.4 (AdoptOpenJDK Java 11.0.9)
[info] set current project to tanishiking (in build file:/Users/tanishiking/src/github.com/tanishiking/)
[info] set current project to tanishiking (in build file:/Users/tanishiking/src/github.com/tanishiking/)

A template to demonstrate a minimal Scala application

name [Hello World template]: hello

Template applied in /Users/tanishiking/src/github.com/tanishiking/./hello
hello ディレクトリ以下に以下のようなプロジェクトが出来ます。
$ tree
.
|-- build.sbt
|-- project
|   `-- build.properties
`-- src
    `-- main
        `-- scala
            `-- Main.scala
build.sbt
project/build.properties
sbt.version=1.4.3 みたいなのが書かれてるはず。ここで利用するsbtのバージョンを指定するよsbt を起動するとここに書かれてるバージョンのsbtがダウンロードされるbuild.sbt のあるディレクトリに移動して sbt を起動する$ sbt [info] [launcher] getting org.scala-sbt sbt 1.4.3 (this may take some time)... ... ... [info] welcome to sbt 1.4.3 (AdoptOpenJDK Java 11.0.9) [info] loading project definition from /Users/tanishiking/src/github.com/tanishiking/hello/project [info] loading settings for project hello from build.sbt ... [info] set current project to hello-world (in build file:/Users/tanishiking/src/github.com/tanishiking/hello/) [info] sbt server started at local:///Users/tanishiking/.sbt/1.0/server/baf7ac7b489b491bdcaa/sock [info] started sbt server sbt:hello-world> sbt:hello-world> compile [info] compiling 1 Scala source to /Users/tanishiking/src/github.com/tanishiking/hello/target/scala-2.13/classes ... update 0s [success] Total time: 3 s, completed Dec 2, 2020, 9:42:12 PM sbt:hello-world> run [info] running Main Hello, World! [success] Total time: 0 s, completed Dec 2, 2020, 9:42:18 PM
$ sbt compile のように shell から実行することも出来ますが、開発中は sbt は立ち上げっぱなしにしておくことが推奨されていますsbt を起動して、そこから console と打ってみましょう
sbt:hello-world> console
[info] Starting scala interpreter...
Welcome to Scala 2.13.3 (OpenJDK 64-Bit Server VM, Java 11.0.9).
Type in expressions for evaluation. Or try :help.

scala>
sbt console からなら sbt でダウンロードした依存ライブラリも import 出来たりするので便利
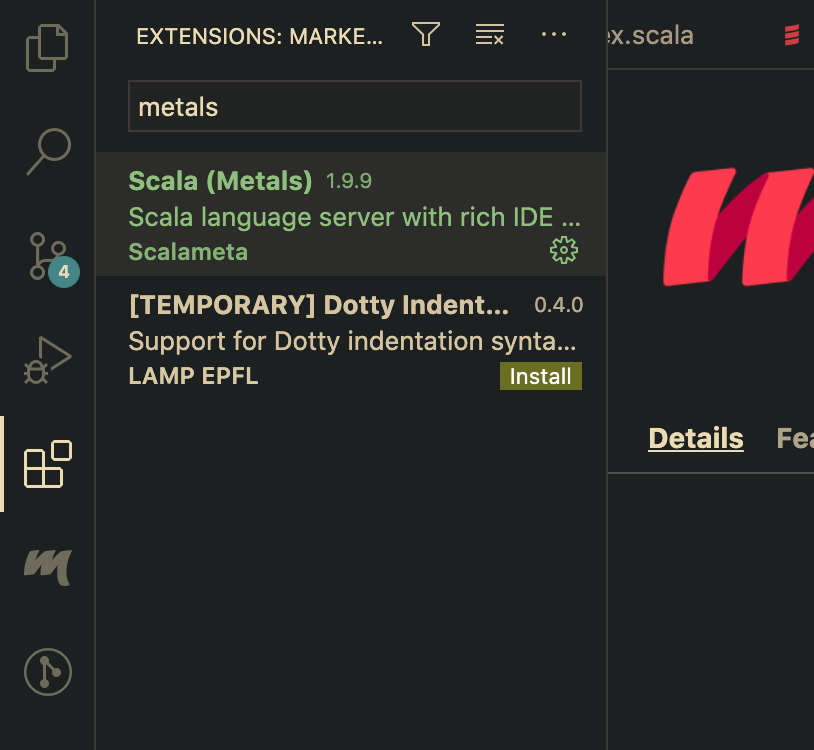
という感じになっています。metals は scalameta という Scala の解析ツールセットをベースにしたLanguage Server Protocol 実装で IntelliJ Scala に次ぐシェアを誇る (https://scalacenter.github.io/scala-developer-survey-2019/) 開発ツールです。
$ code .
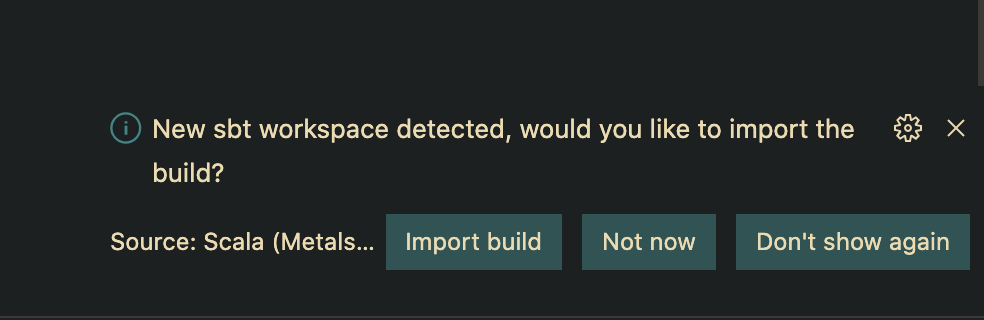
ダウンロードが完了したら build.sbt や *.scala ファイルを開いてみましょう。以下のようなポップアップが出てくるので Import build を押して暫くお待ち下さい。
これでセットアップ完了です
間違えて Import build しそこねた人は VSCode のコマンドパレットを開いて > metals: Import build を実行してね。
なんかIDEがcomopletionとか返してくれなくなったときは一度 .metals と .bloop というディレクトリを削除してVSCodeを再起動しましょう。(IDEのサーバー安定させたいと思っている)
scalameta.org を使いましょう
.scalafmt.conf を作って version=2.7.4 とか書いてください
> Format Document を実行してみましょう。開いているファイルに対してフォーマットが実行されます。.scalafmt.conf が存在しない場合は以下のようなポップアップが出てくるので Create '.scalafmt.conf' を押して勝手にファイルを作ってもらったりしましょう。Format On Save を有効にすると save 時に勝手にフォーマットしてくれるようになる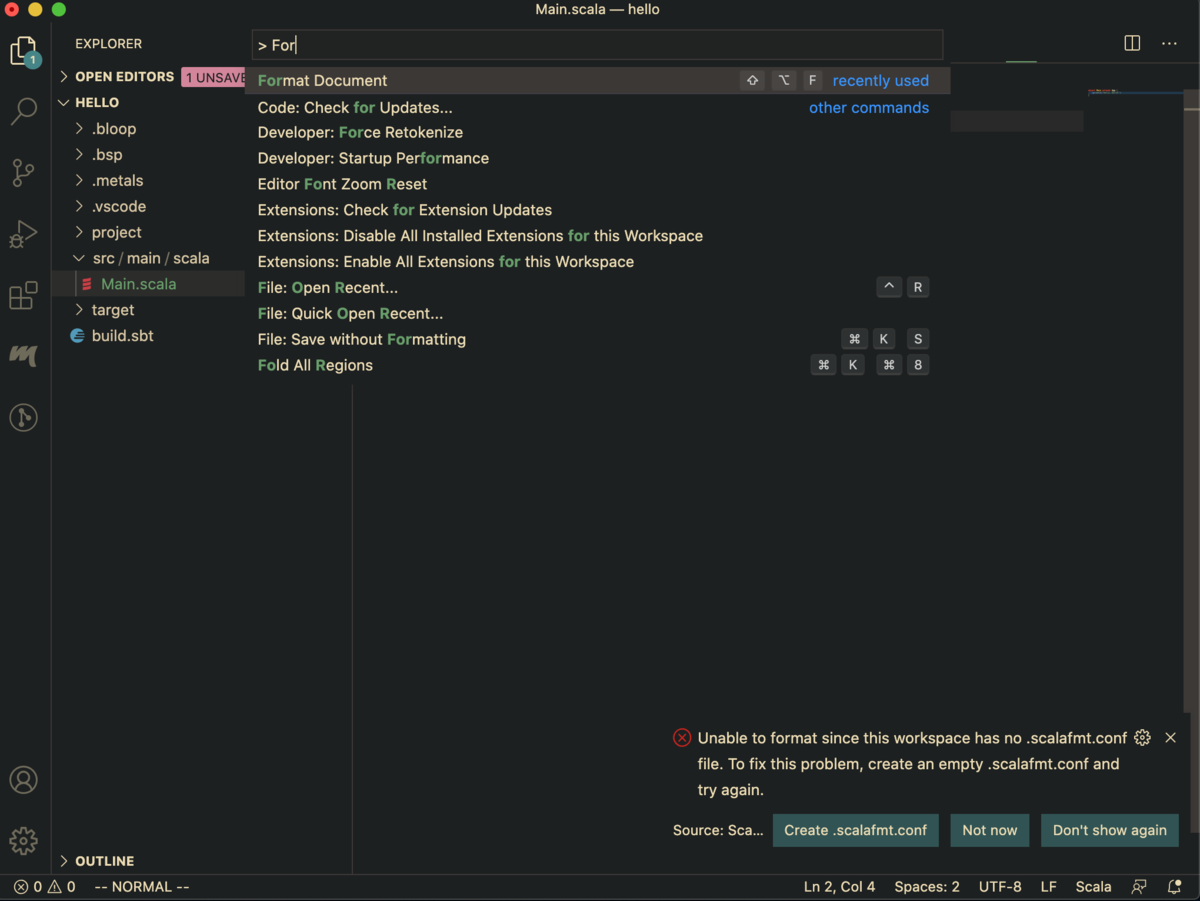
project/plugins.sbt に以下のように書いて sbt を起動します
sbt-scalafmt のバージョンと、上に書いた scalafmt のバージョンは完全に独立しています。sbt-scalafmt は scalafmt 本体をダウンロードしてきて、それを使ってフォーマットを実行するやつaddSbtPlugin("org.scalameta" % "sbt-scalafmt" % "2.4.2")
sbt を立ち上げ以下のコマンドを打つことで全てのファイルをフォーマットする
sbt:hello-world> scalafmtAll
詳しくは
https://scalameta.org/scalafmt/docs/installation.html#task-keys
Scala ってデファクトな感じの Linter がないんですよね
一応カスタマイズしやすくて将来的に Scala3 との互換性も保たれそうな Linter(Refactoring tool) としては scalafix が有望、他には WartRemover とかかなぁだけど、そんなに使われてる印象ない
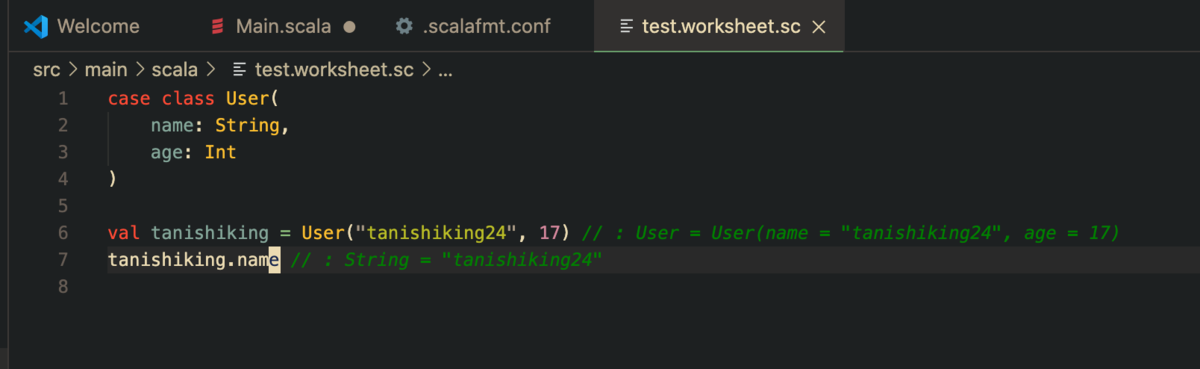
コマンドパレットから New Scala File を選び、Worksheets を選ぶ。

xxx.worksheet.sc というファイルができるので、そこに適当な scala スクリプトを書いてみよう。以下のような感じでコメントに評価結果が表示される。
Deep Learning Specialization 5つ目のコース www.coursera.org
今回はみんな大好き word embedding
Deep Learning Specialization 5つ目のコース www.coursera.org
CNN より RNN のほうが興味あったので先にこっちを先にやった。分量が多くなりそうなので分けておく。やっとこさRNNだよ。